
Guides
Professional Food Photography in 2026: Costs, Craft, and the AI Shortcut
Food photography shapes how customers understand a dish before they can see it in person. This guide covers what an intentional image looks like in 2026, what a traditional shoot can cost, and where AI-assisted experiments may help or introduce fidelity risk.
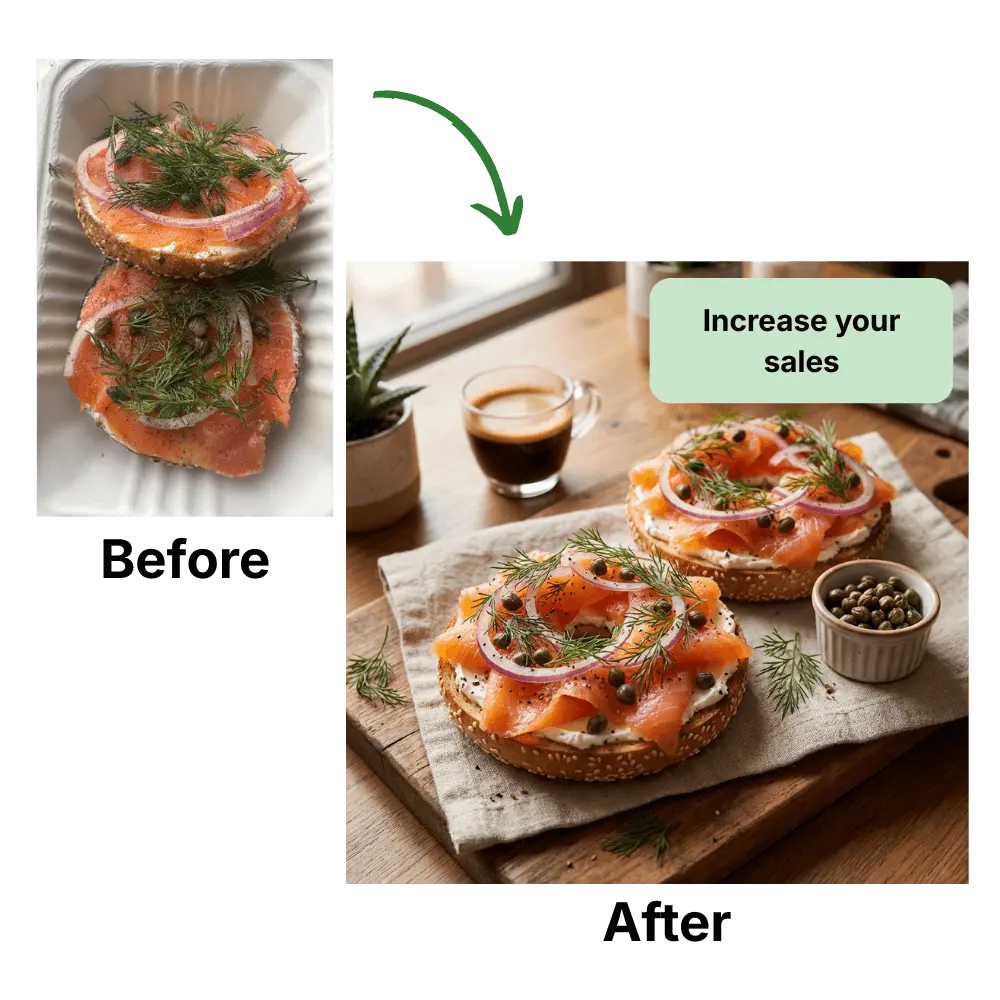
Why professional food photos are worth the effort
Delivery platforms encourage merchants to add accurate menu photos because images help customers understand what they are ordering. The size of any conversion effect depends on the business, platform, dish, image, and offer; a polished photo is not a revenue guarantee.
The catch is that “professional” used to mean “expensive and slow.” That's the part that changed.
What does professional food photography cost in 2026?
Here's the honest range for getting a professional photo of your dish, from most to least expensive per image:
| Option | Typical cost | Per image | Turnaround |
|---|---|---|---|
| Freelance food photographer | $300–$1,500 per shoot | ~$30–$80 | Days to weeks |
| Virtual/remote studio (e.g. Soona) | $39/photo + ~$149 studio fee | ~$39+ | ~24 hours to days |
| Stock library (not your dish) | ~$36/mo for 10 images | ~$3.60 | Instant |
| AI food photography (PlateSnap) | $40/mo guided pilot | 100 credits; 1–3 credits per output | Provider-dependent |
A traditional shoot buys you the highest ceiling on quality and a real human art director — but you pay for a controlled set of images. Stock can be inexpensive but does not show your actual dish. AI-assisted tools offer lower-cost attempts from a reference image, but their usable-output cost depends on failures, review time, and fidelity. Every generated result needs a human check before publishing.
How to compare food photography pricing for a restaurant menu
Food photography pricing is more than a photographer's day rate. A useful quote should say how many menu items will be prepared, how many finished photos you will receive, and what is included before and after the shoot. That makes a small restaurant shoot easier to compare with a virtual studio or an AI workflow.
- Crew. A larger production may include a food stylist who prepares each plate for the camera, plus assistants or a prop stylist. A lean shoot may ask your kitchen team to plate every dish instead.
- Menu size. Ten dishes with one approved image each is a different job from ten dishes shot at three angles. Agree on the shot list and final selects before comparing prices.
- Location and setup. Travel, lighting, backgrounds, props, and kitchen access can add time even when the finished restaurant menu needs only simple, consistent photos.
- Editing and revisions. Ask how much retouching is included and what happens if a dish must be replated or photographed again.
Divide the total quote by the number of approved, usable dish photos — not by the number of shutter clicks. For restaurant menu photography, that cost per approved dish image is the most useful comparison. Then consider how often the menu changes. A planned shoot can be the better value for a stable flagship menu, while a reference-guided tool can be a practical experiment for one new dish between shoots. PlateSnap's guided Business pilot is $40/month for 100 credits, with no free trial; each completed generation produces one JPEG for review.
Curious what the workflow can produce from your own dish? The studio supports one reference photo and one JPEG output per generation. Guided pilot access is issued manually while checkout is paused.
Open the PlateSnap studio →What actually makes a food photo look professional?
Whether a human, a phone, or an AI produces the image, the same fundamentals separate a professional shot from a snapshot. If you understand these five, you'll know what to ask for — and what to fix.
1. Light is 80% of it
Professional food photos use soft, directional light — think a large window with a sheer curtain, not an overhead kitchen fluorescent or a phone flash. Side-light and back-light reveal texture (the crackle on bread, the gloss on a sauce, the steam off a bowl); flat front-light flattens everything. Harsh direct flash is the single fastest way to make food look cheap.
2. The angle should match the dish
There is no single “best” angle — there's a right angle per dish, which is why PlateSnap lets you choose one:
- Overhead (flat lay) — bowls, spreads, pizzas, coffee, anything defined by its top surface or arranged as a scene.
- 45° — the “human eye” angle and the safe default for most plated dishes, burgers, and pasta. It shows both the top and the height of the food.
- Straight-on (side) — layered and stacked food where height is the story: burgers, cakes, pancake stacks, drinks in a glass.
Explore how a single dish reads across styles and angles in the PlateSnap style gallery.
3. Composition and negative space
Pros fill the frame with the food — usually 50–70% of it — and leave clean negative space around it so the dish breathes (and so it can be cropped later for a square Instagram post, a 16:9 delivery tile, or a vertical story). A cluttered background pulls the eye away from what you're selling.
4. Styling and freshness
A wiped plate rim, a fresh garnish, a deliberate drip or crumb, a bit of steam — these are the small, intentional touches that read as “shot on purpose.” Wilted herbs and smudged plates read as “taken in a hurry.”
5. Color and consistency
Professional sets share a consistent look — the same warmth, contrast, and background family — so a menu or feed feels like one brand, not twelve random photos. PlateSnap currently lets you choose a style for each generation; it does not yet save a reusable brand system.
9 practical tips for food photos that look professional
Principles are one thing; here's what actually happens on a good shoot — the working knowledge food photographers use every day, whether you're a restaurant owner with a phone or briefing an AI tool.
- Plan a shot list first. Professionals never wing it — before anything is cooked they build a shot list and a quick pre-production plan: which dishes, which angles, which crops. It keeps a session fast and makes sure you leave with every image your menu and socials need.
- Start with window light. Soft, natural light near a window is the most flattering — and free. If you have to use artificial light, diffuse it through a softbox, an umbrella, or even a white bedsheet; raw flash and bare bulbs are what make food look grainy and cheap.
- Get up close. The most appetizing restaurant food photography lives in the detail — the melt, the crumb, the steam. A macro or close-up shot that fills the frame almost always beats a distant “whole table” shot.
- Use props, surfaces, and backdrops. A linen napkin, a worn wooden board, a textured backdrop, a scattered ingredient — thoughtful surfaces and props add context and depth without stealing focus from the dish.
- Show off unique dishes and glassware. Your signature plating and interesting glassware are part of your brand — lean into them rather than shooting everything on the same plain white plate.
- Add a human element. A hand pouring a sauce, reaching for a fry, or holding a burger adds motion and life, and it's a proven way to make a photo feel real rather than staged.
- Capture a few interior/context shots. The dish in its setting — on the table, with the room behind it — tells a story a tight crop can't, and gives you variety for social and your Google listing.
- Shoot variations. Overhead, 45°, and side crops of the same dish mean one setup yields several usable images — one of the biggest efficiency tricks in the food industry.
- Develop a consistent style. The thing that separates a professional food photography portfolio from a phone camera roll is a recognizable, repeatable look — a personal style your customers start to associate with your brand. Pick your lighting, palette, and framing, and apply them to every dish.
AI can reduce the manual staging and editing work, but consistency is not automatic. Keep a written style brief, reuse the same settings, and review every result against the real dish.
The three ways to get professional food photos
Every restaurant, café, and food brand is choosing between three real options. Here's the honest trade-off.
Hire a photographer
Best when you need a hero brand campaign, a physical shoot with props and a human art director, or absolute top-end quality for a flagship location. Downsides: it's the most expensive path, it takes days to weeks to schedule and edit, and you get one fixed set that can't keep up with a menu that changes seasonally.
Shoot it yourself on a phone
Modern phone cameras are genuinely good, and with the five fundamentals above you can get decent results for free. The reality for most owner-operators, though, is that photography is a skill and a time sink you don't have — which is why so many real menus are full of dim, flash-lit photos that actively lose orders.
Generate them with AI
Useful as an experiment when you have a real reference image and can tolerate variation. A model may change lighting, staging, background, ingredients, portions, or plating, so the result is source material to review — not a guaranteed professional or platform-ready image.
How AI changed professional food photography
A useful distinction is reference-guided generation versus text-only invention. Starting from a genuine photo gives the model more context, but it does not guarantee that the food stays unchanged. Compare ingredients, portions, plating, and identity with the real dish before using the result.
Fabricating a dish you do not make or misrepresenting portions and ingredients can erode trust and may violate a destination's rules. Even a reference-guided result can drift, so verify current platform requirements and treat AI as an iterative production tool rather than a compliance shortcut.
If you are deciding between reference-led, enhancement-only, mobile, and delivery-platform workflows, use our honest AI food photography tool comparison to match the workflow to the job.
How to get professional food photos from one dish photo
With PlateSnap the workflow is deliberately short:
- Upload one clear photo of the real dish. Better lighting and an unobstructed view give the model a more useful reference, but do not eliminate drift.
- Pick a style and angle. Choose from 30 styles across clean/menu, delivery, marketing, and fine-dining looks, and set the angle to match the dish.
- Generate. PlateSnap returns one JPEG at 1K, 2K, or 4K. Review dish identity, ingredients, portion size, and crop before deciding where to publish it.
The current product does not save a brand preset or build a campaign pack. Repeat the same settings manually if you want to test whether a group of outputs feels coherent.
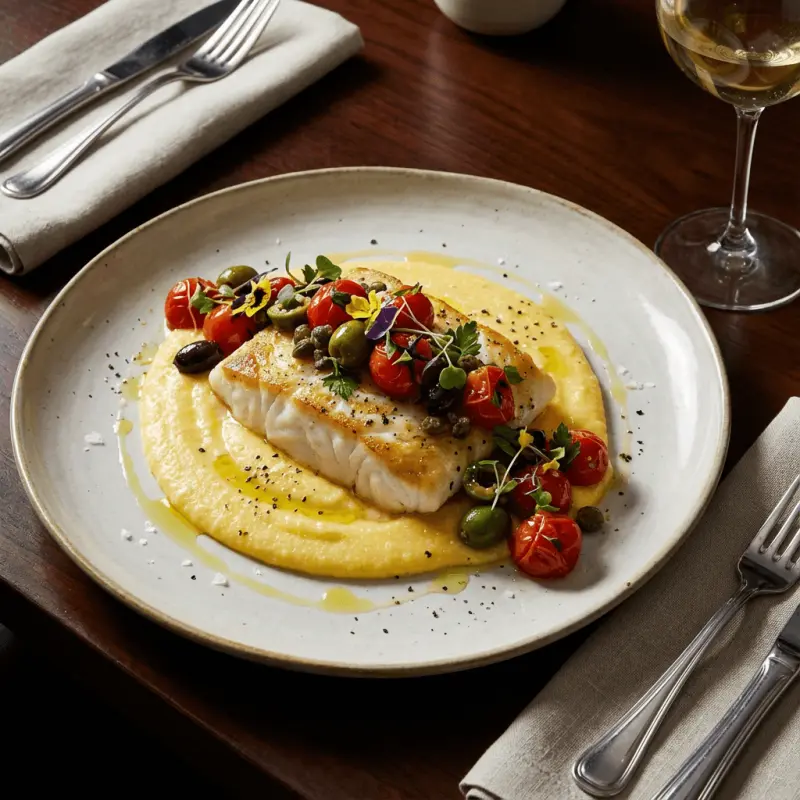
Do you still need a professional photographer?
Honest answer: sometimes. If you're shooting a flagship brand campaign, a cookbook, or hero imagery where a human art director and physical styling genuinely matter, hire the photographer. For recurring menu, delivery, social, seasonal, or Google Business imagery, AI can be a lower-cost experiment between shoots. Use a photographer whenever fidelity, styling control, people, props, or a flagship campaign make human direction important.
Test one real dish photo, one chosen style, and one output at a time. Guided Business pilot access is currently handled manually.
Open the PlateSnap studio →Frequently asked questions
- How much does professional food photography cost in 2026?
- Hiring a freelance food photographer typically costs $300–$1,500 per shoot, or roughly $30–$80 per finished image. Virtual studios and stock libraries use different pricing models. PlateSnap is currently testing a $40/month Guided Business pilot with 100 credits; each output costs one to three credits depending on resolution.
- Can AI make professional food photos?
- AI tools can restyle a real photo by changing lighting, background, staging, and styling. Start from a genuine photo of a dish you serve, then review every result for ingredient, portion, plating, and identity drift before publishing it.
- What is the best angle for food photography?
- It depends on the dish. Use an overhead (flat-lay) angle for bowls, pizzas, coffee, and spreads; a 45-degree angle for most plated dishes, burgers, and pasta; and a straight-on side angle for tall, layered foods like burgers, cakes, and drinks. PlateSnap lets you choose the angle to match each dish.
- Do I need a professional camera for good food photos?
- A modern phone camera plus soft, directional light can capture a useful reference. Keep the dish clear and accurately framed, then review any AI-assisted result carefully: the model can change ingredients, portions, plating, or other details instead of reliably supplying a professional finish.
- Is AI food photography allowed on DoorDash and Uber Eats?
- Platform rules and review decisions can change. Some platforms provide their own AI-assisted photo tools, but that is not blanket approval for every generated image. Check the destination’s current requirements and ensure the image accurately represents the actual item, quantity, ingredients, and portion.
- Is it cheaper to use AI or hire a food photographer?
- AI can have a lower cash cost per attempt, but the useful comparison includes failed attempts, review time, fidelity risk, and support. A photographer remains the stronger choice when a campaign needs precise art direction, people, props, or guaranteed control.
Try a focused food-photo workflow
Upload one real food photo, choose a style and format, and generate one JPEG at a time. Guided pilot access is currently issued manually.
Open the studio →